Tuesday, November 15, 2022

The Color in my Life with Lindys

Hey there guys!
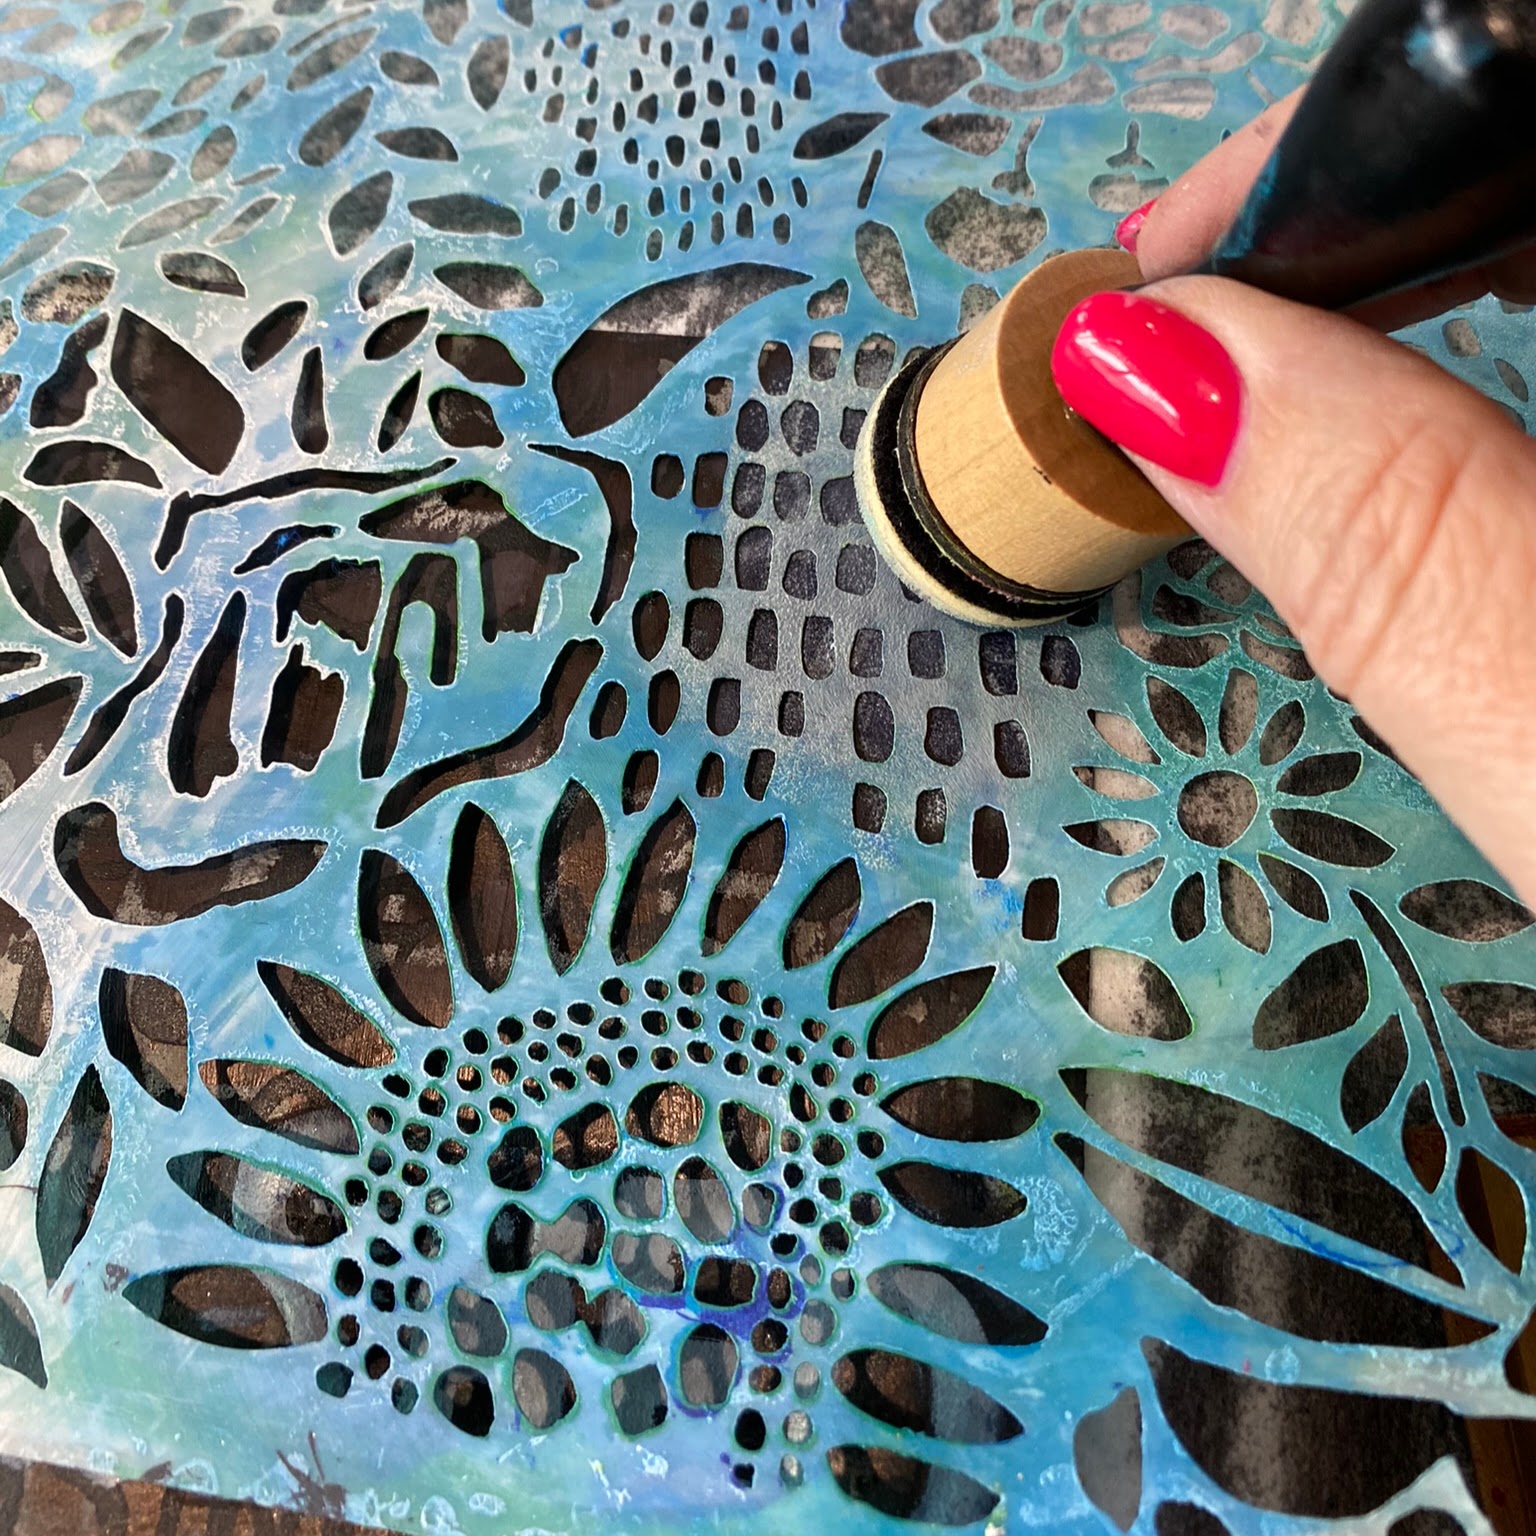
Today I am sharing another bight and happy Scrapbook Page using Lindys Sprays.

OLYMPUS DIGITAL CAMERA

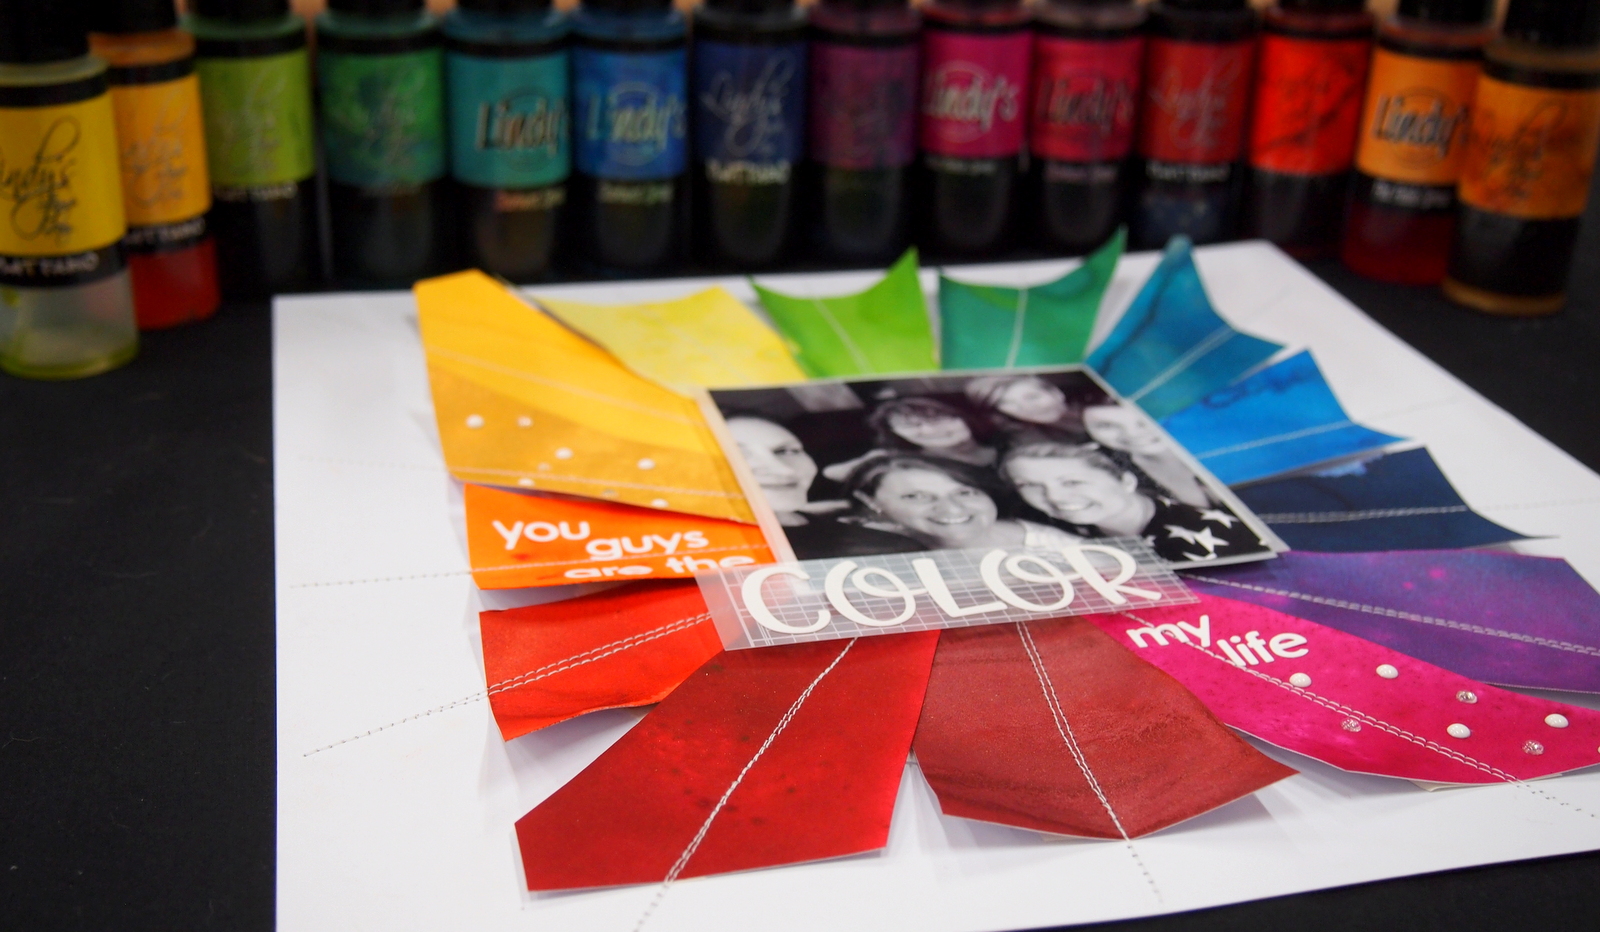
I was inspired by a birthday card I saw somewhere on Pinterest ages ago and thought this style of page would be the perfect way to showcase this great photo of my Crafty Besties and I.
Here are a few simple steps to create this projects.

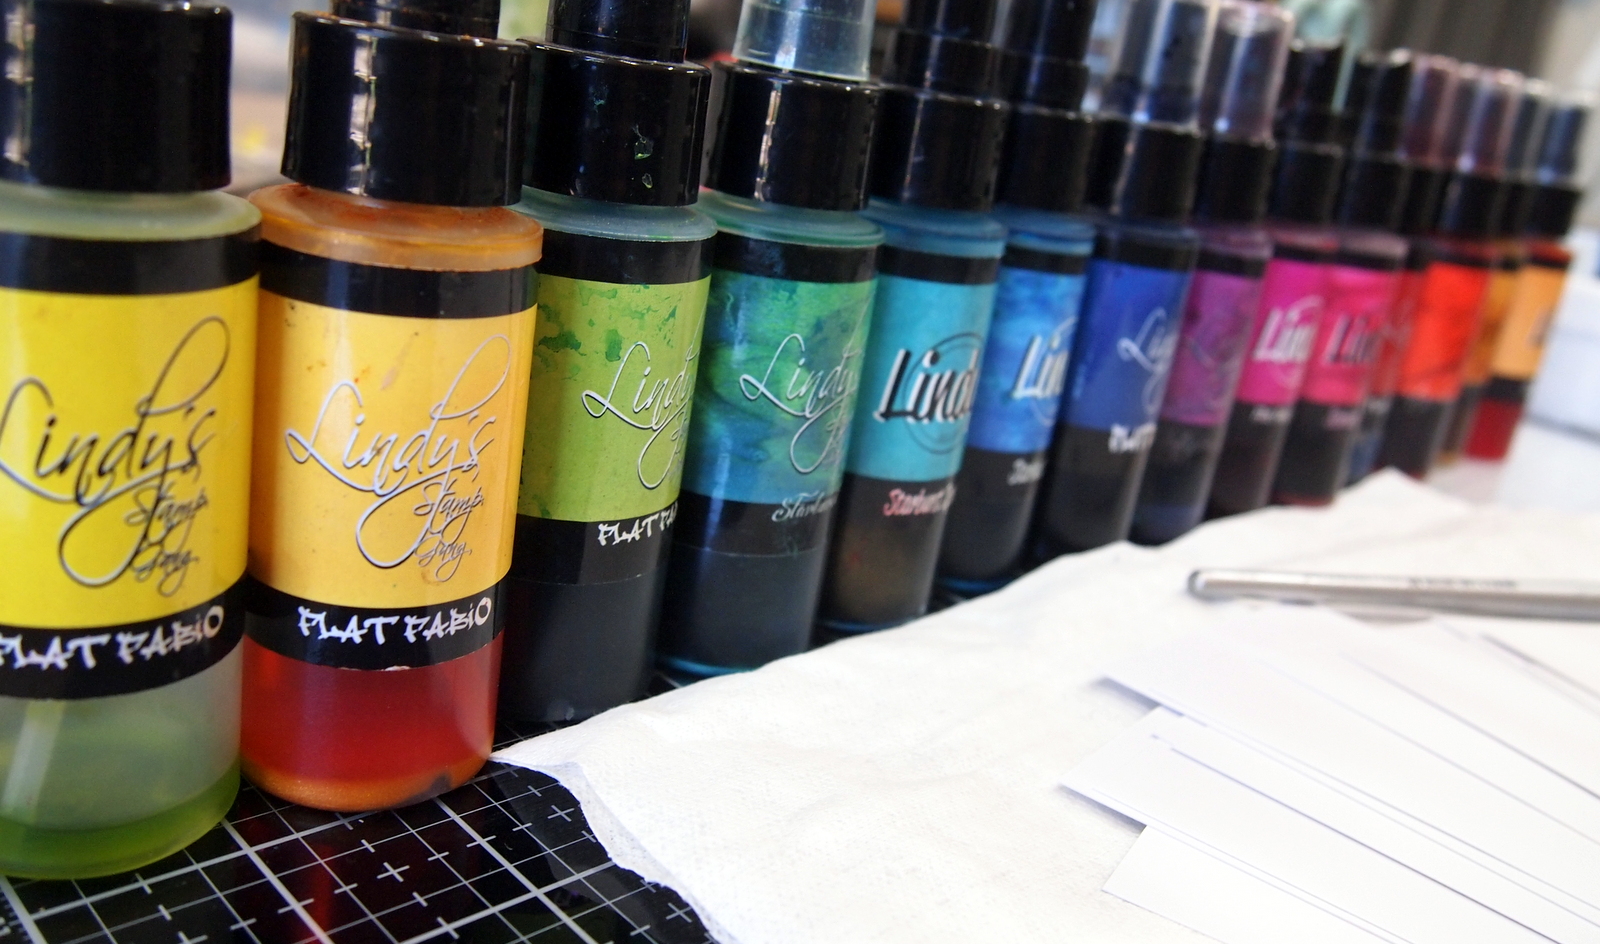
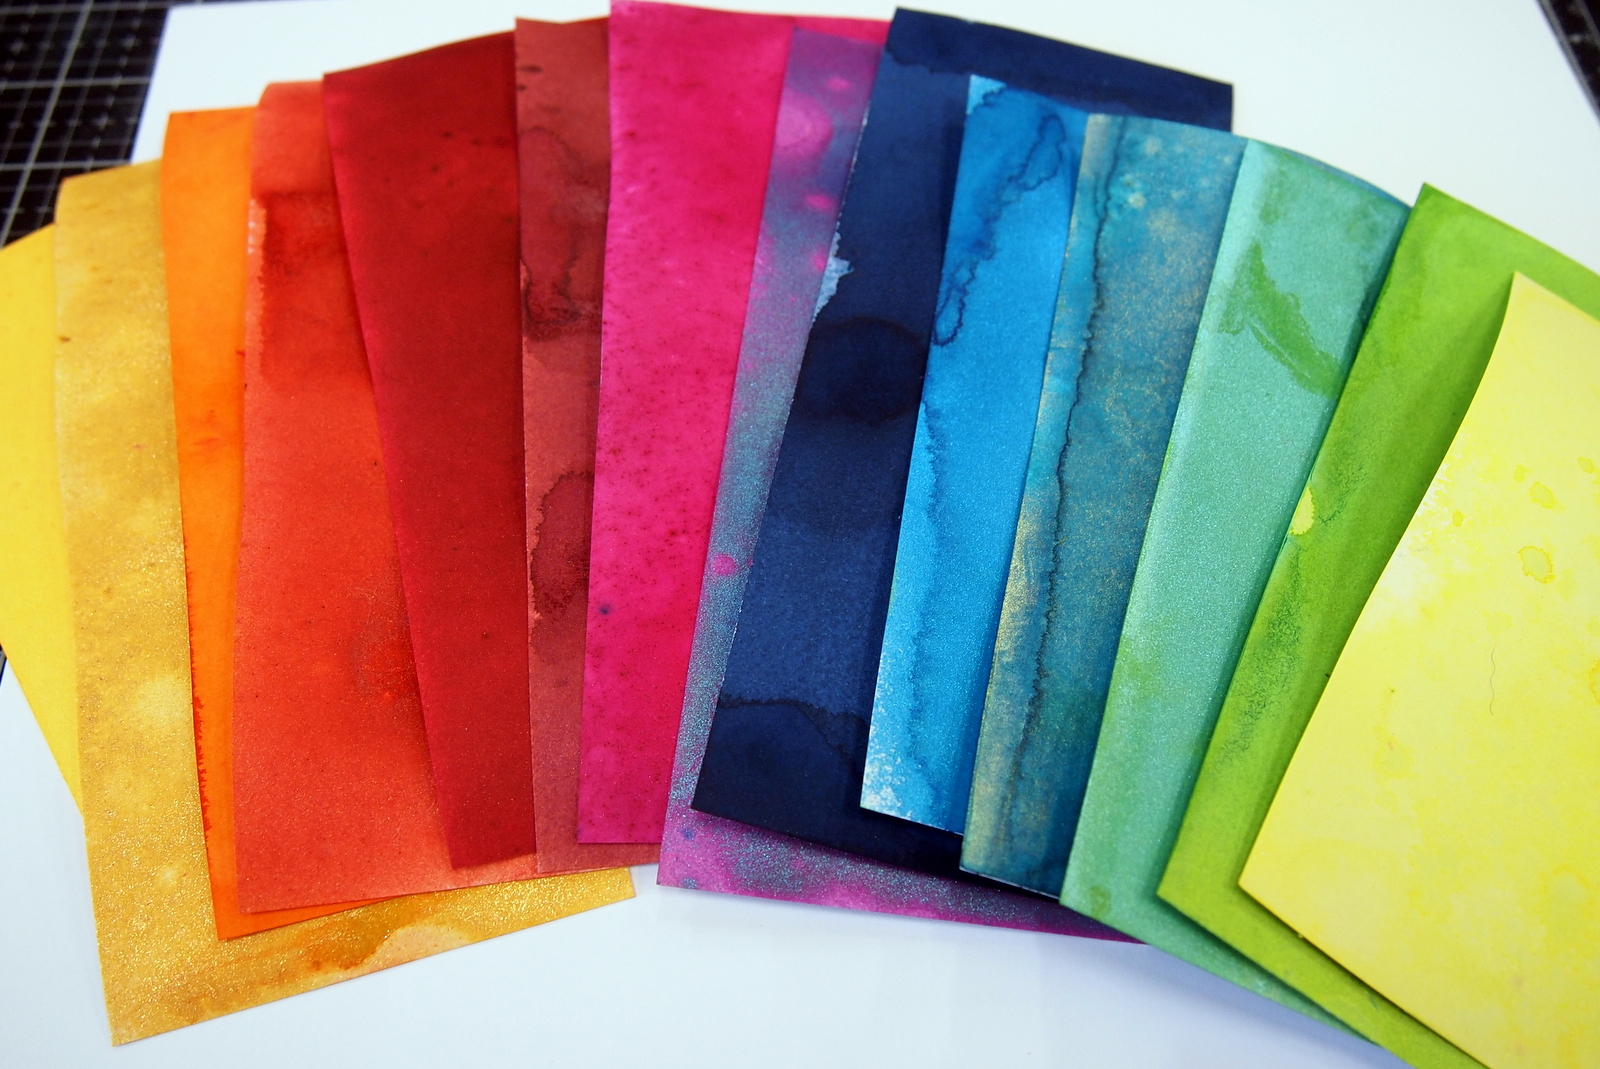
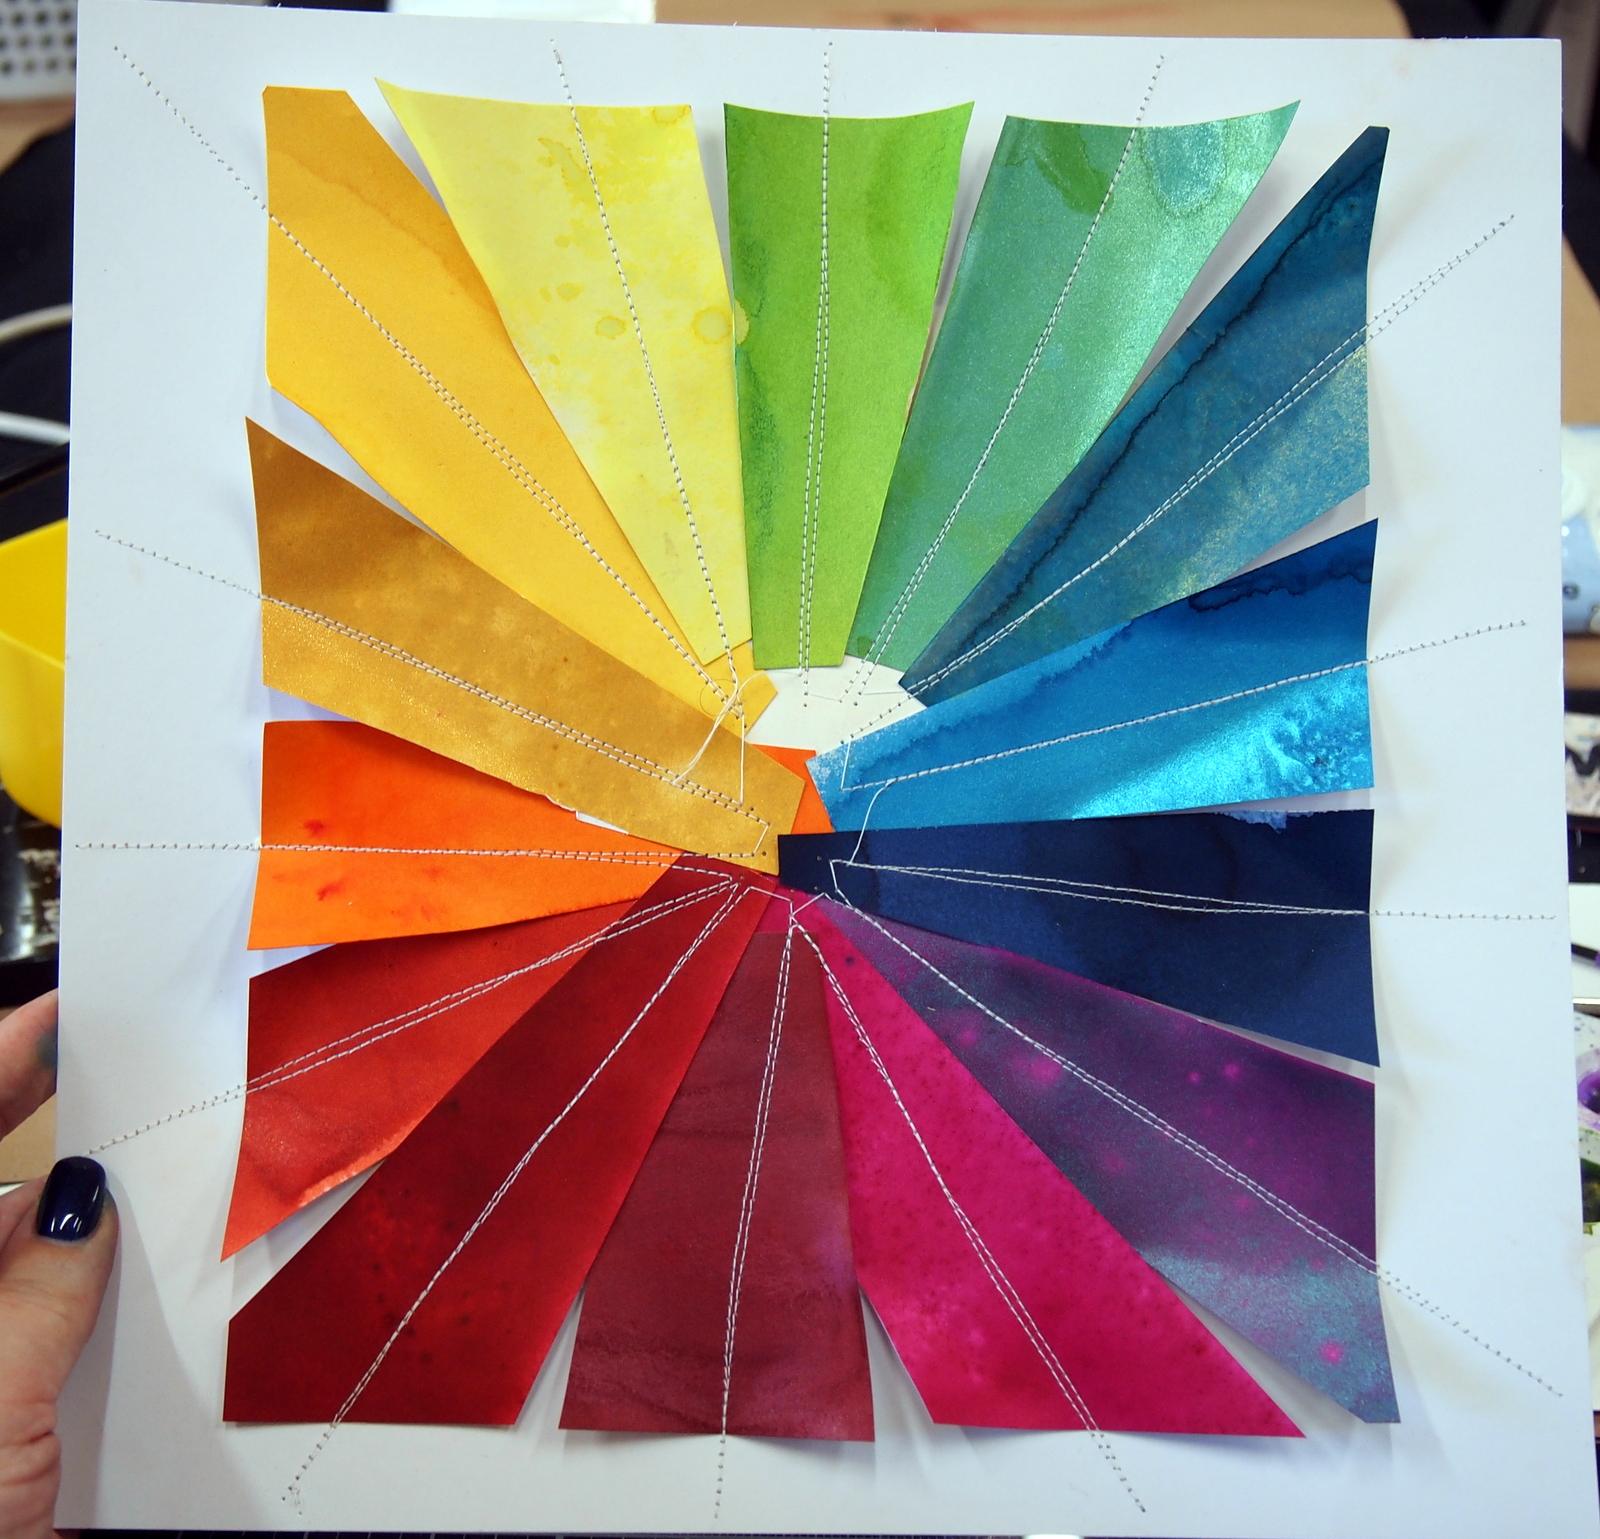
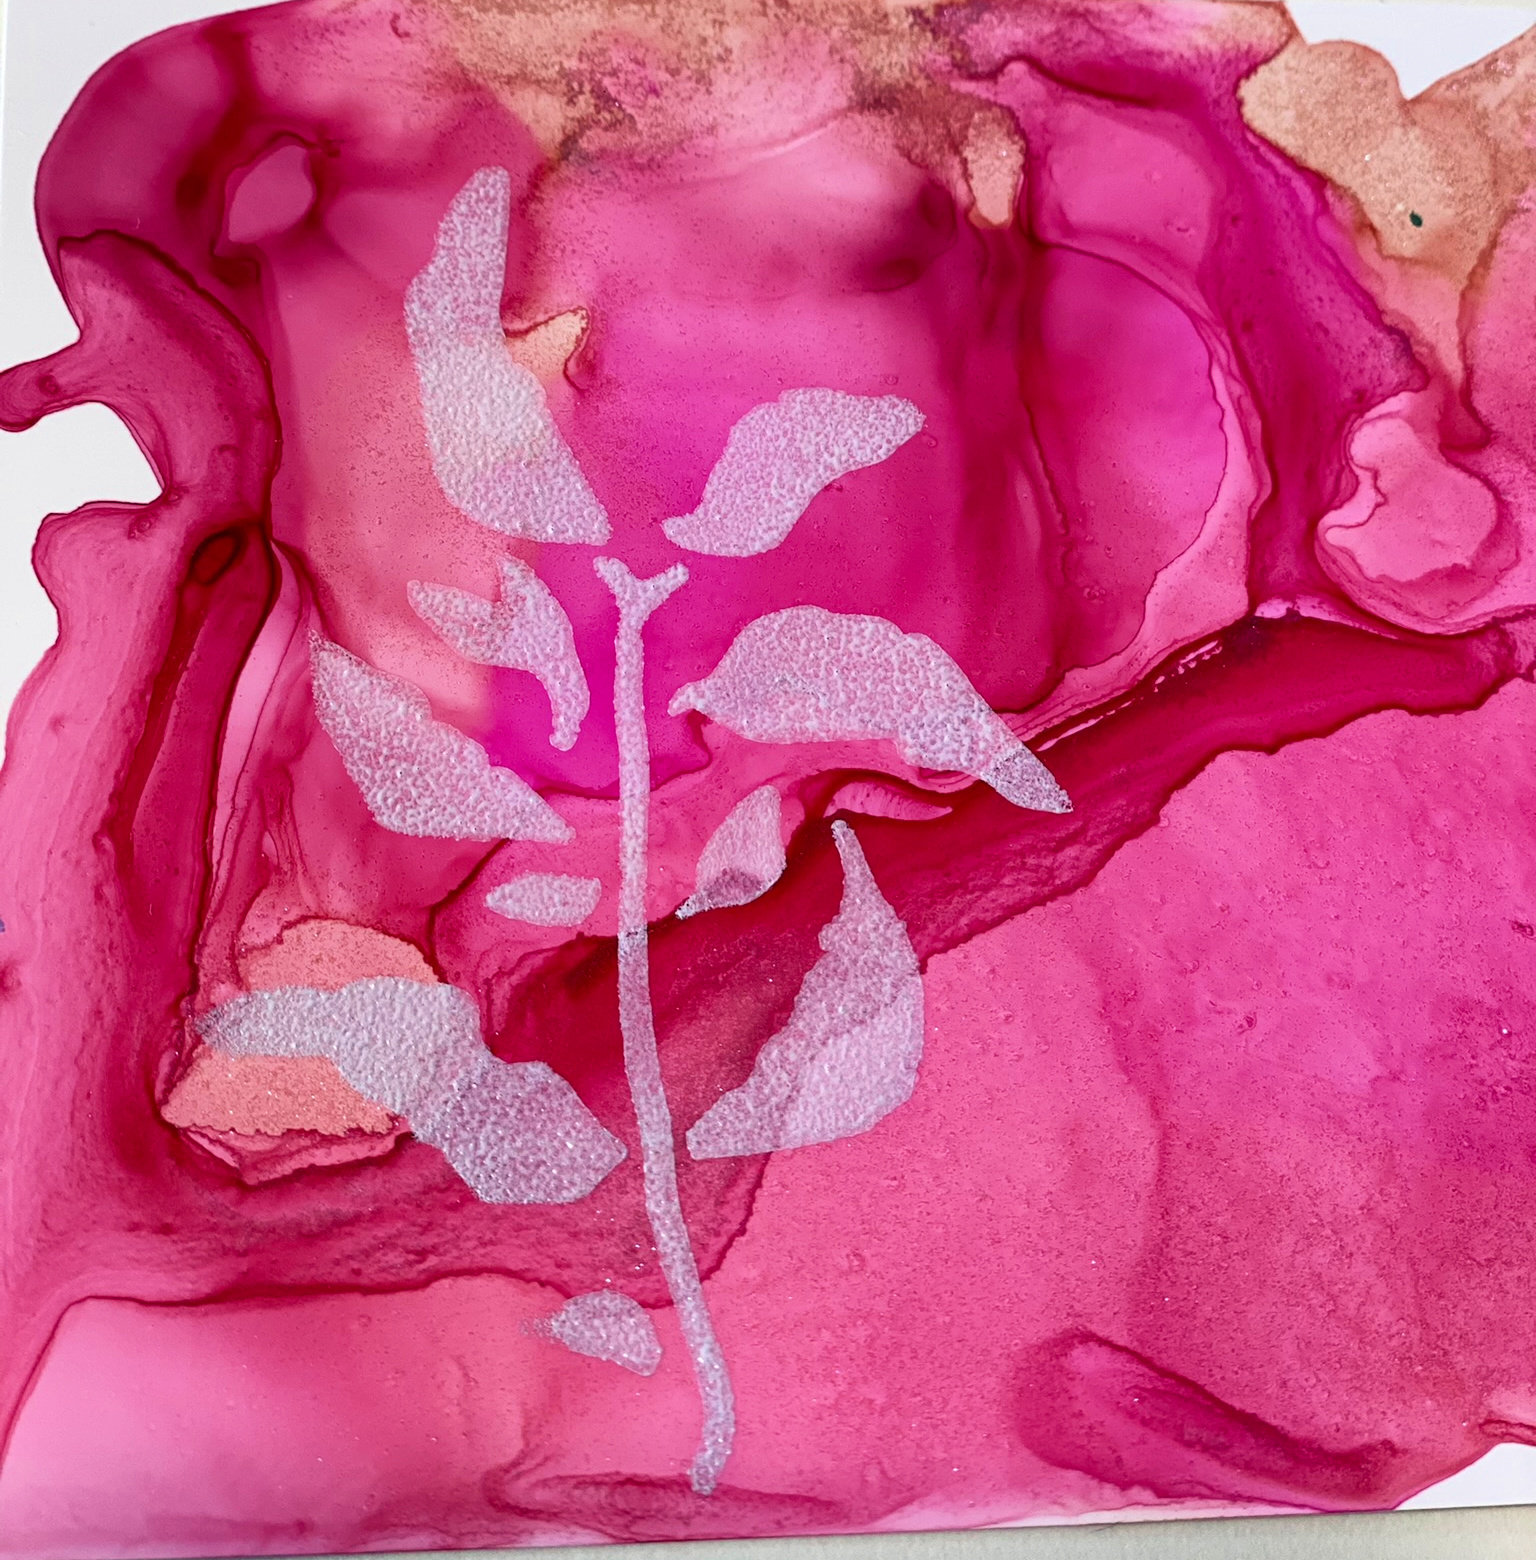
I started by pulling out 14 colors that represented the color wheel ... I have listed the full color range at the end of this post.

OLYMPUS DIGITAL CAMERA


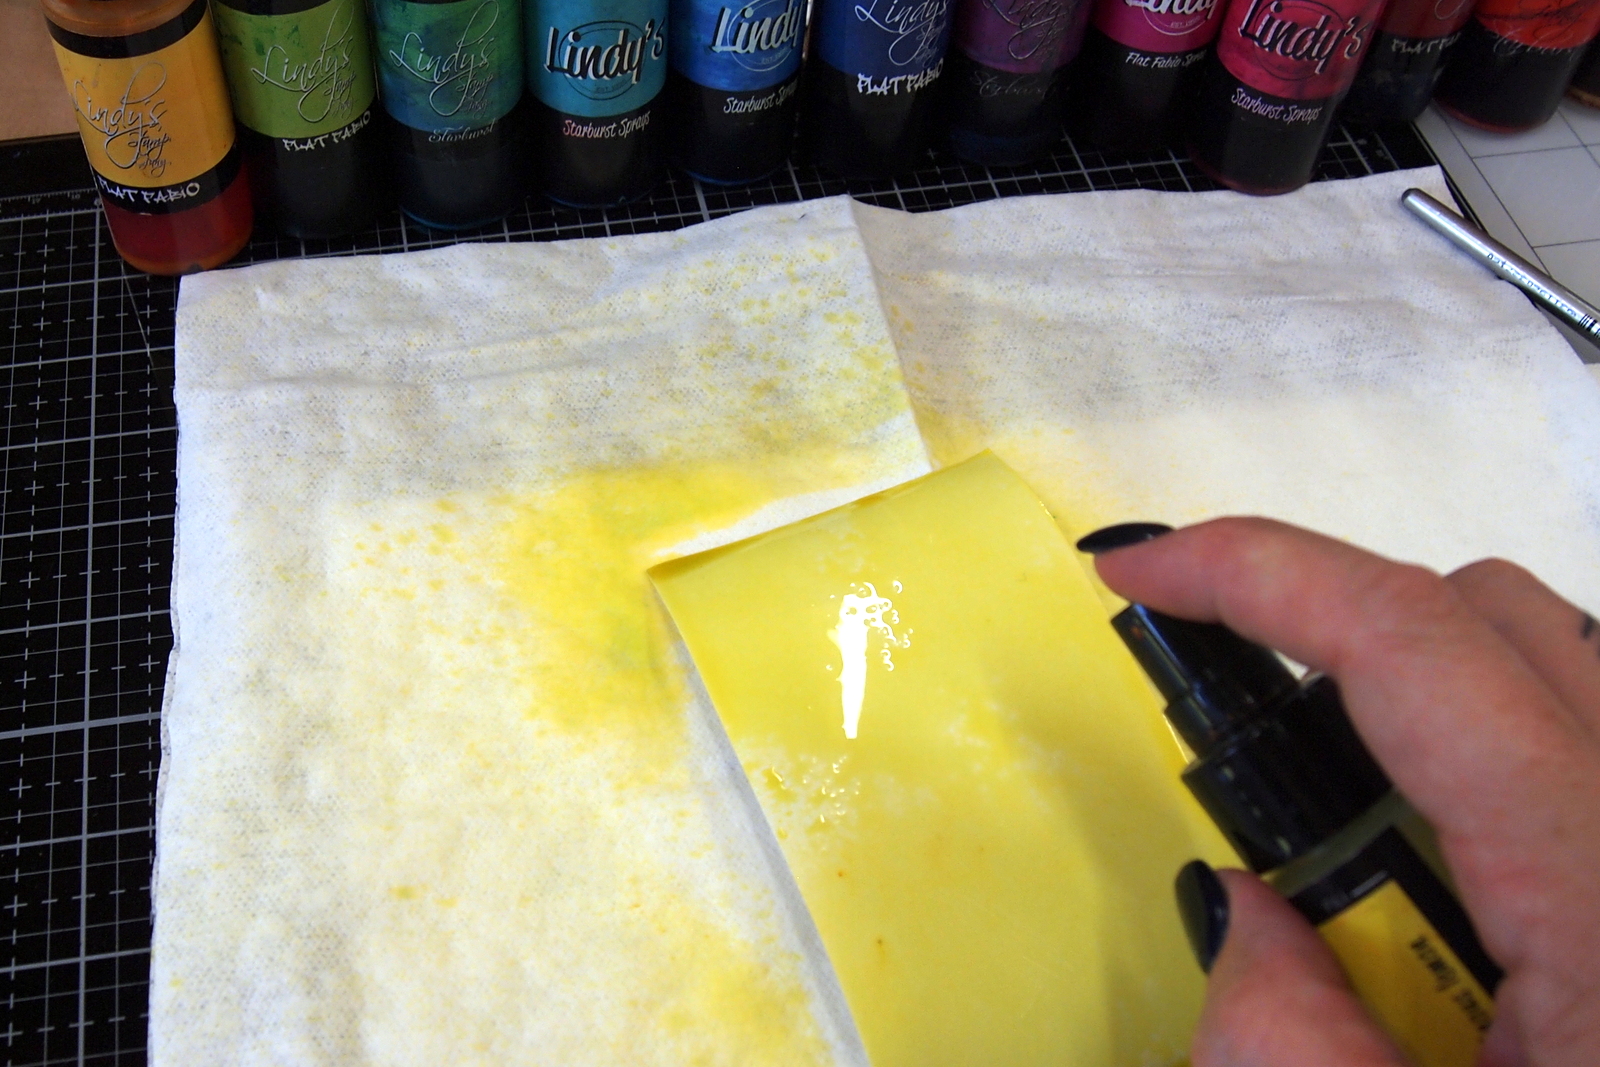
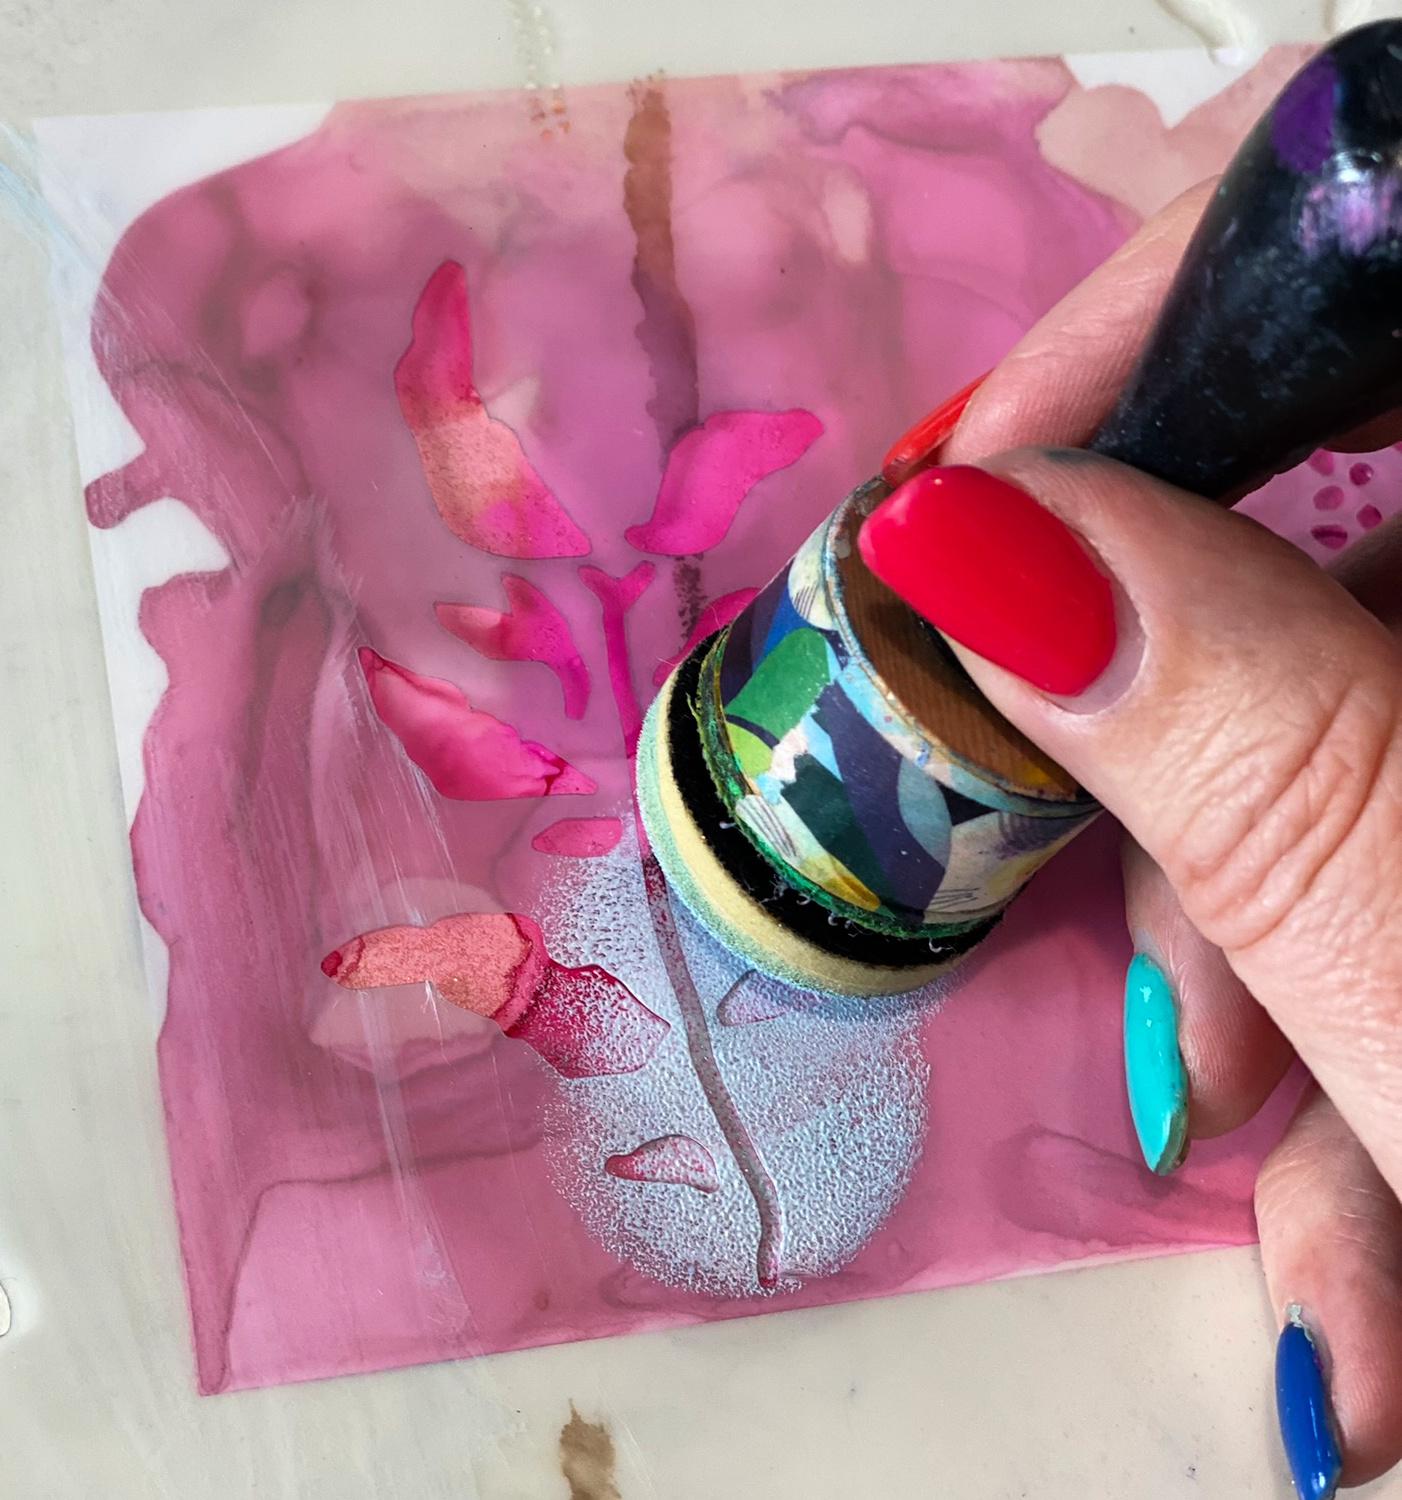
I cut some plain cardstock to be about 6x3 inches and individually sprayed each one, making sure that I got a good coat of color. Just a tip before you start spraying - use some paper towel to catch any excess and protect your workspace and lightly spray the back of your paper with water first to stop it curling.

OLYMPUS DIGITAL CAMERAOLYMPUS DIGITAL CAMERA
OLYMPUS DIGITAL CAMERA


Once dry, I started laying all the pieces out on a separate piece of paper in the order that I wanted them. 
OLYMPUS DIGITAL CAMERAOLYMPUS DIGITAL CAMERA

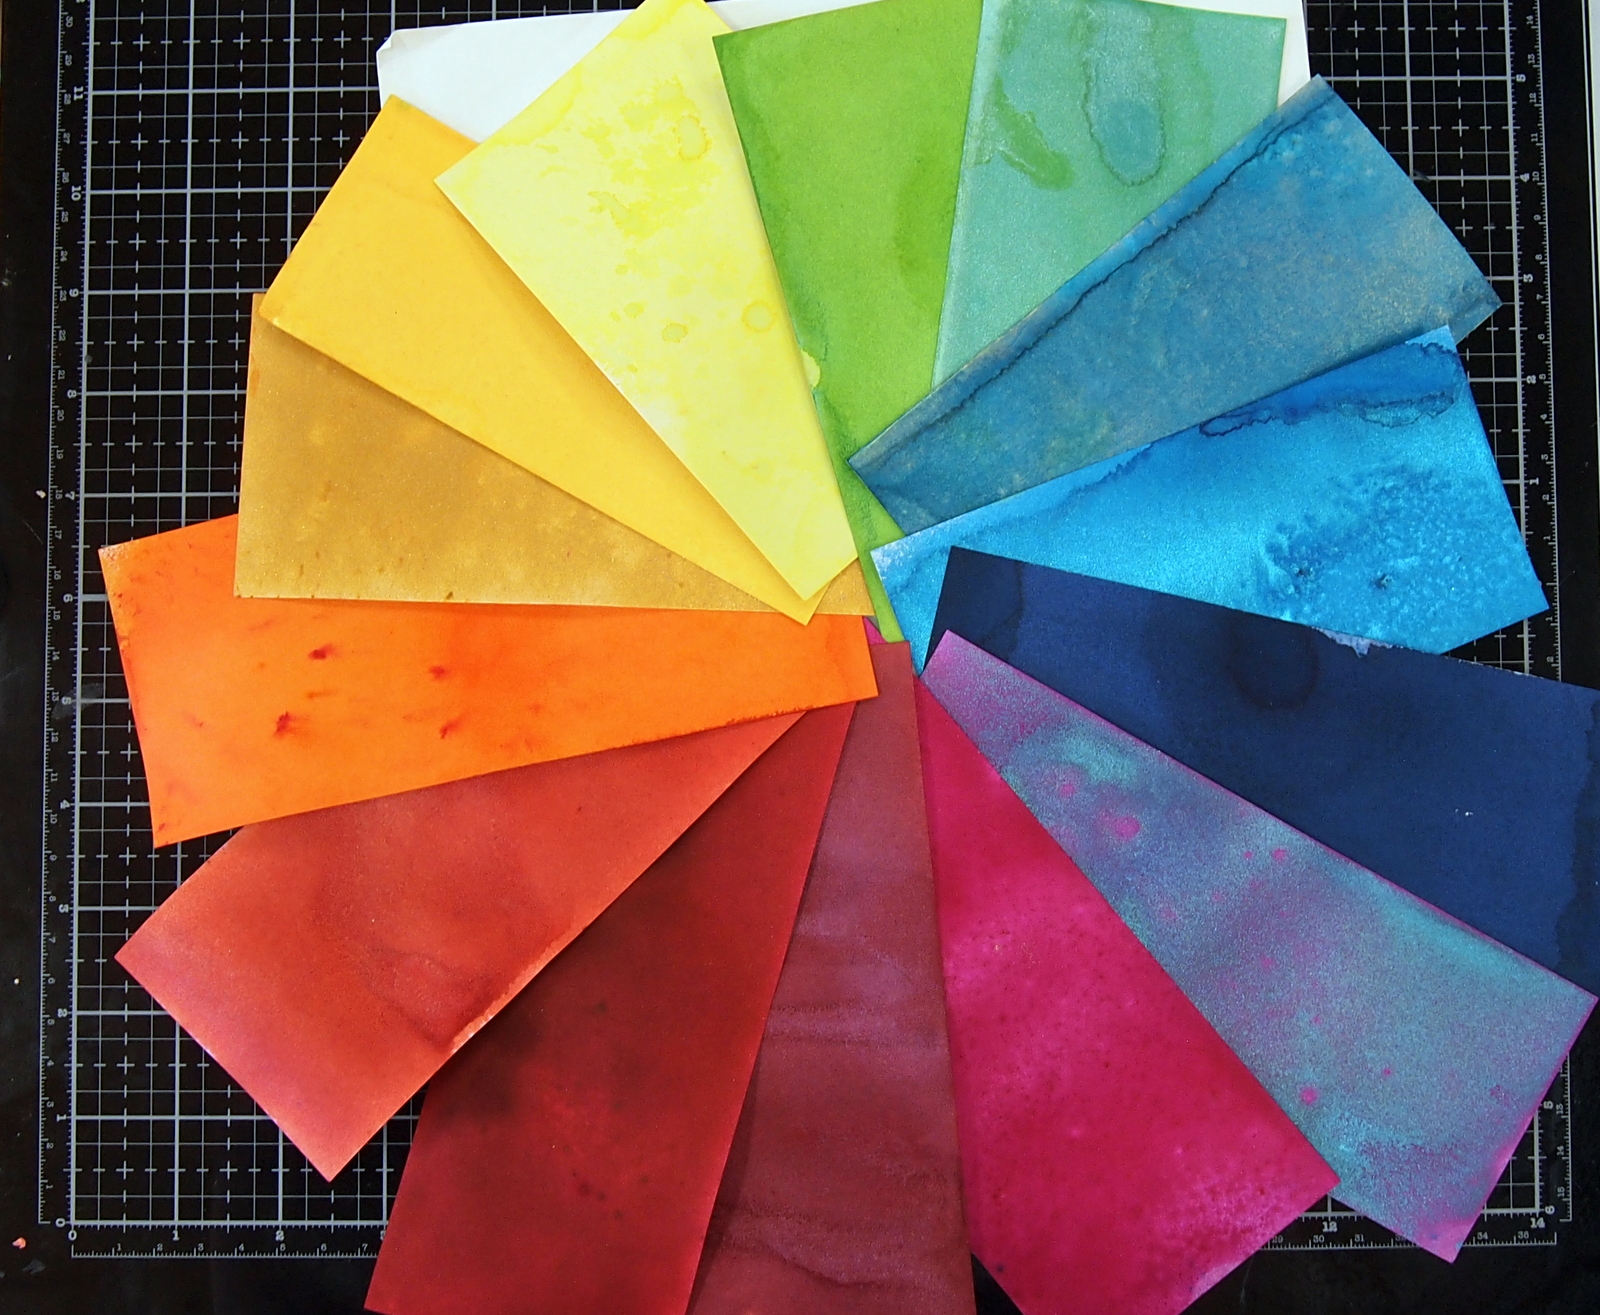
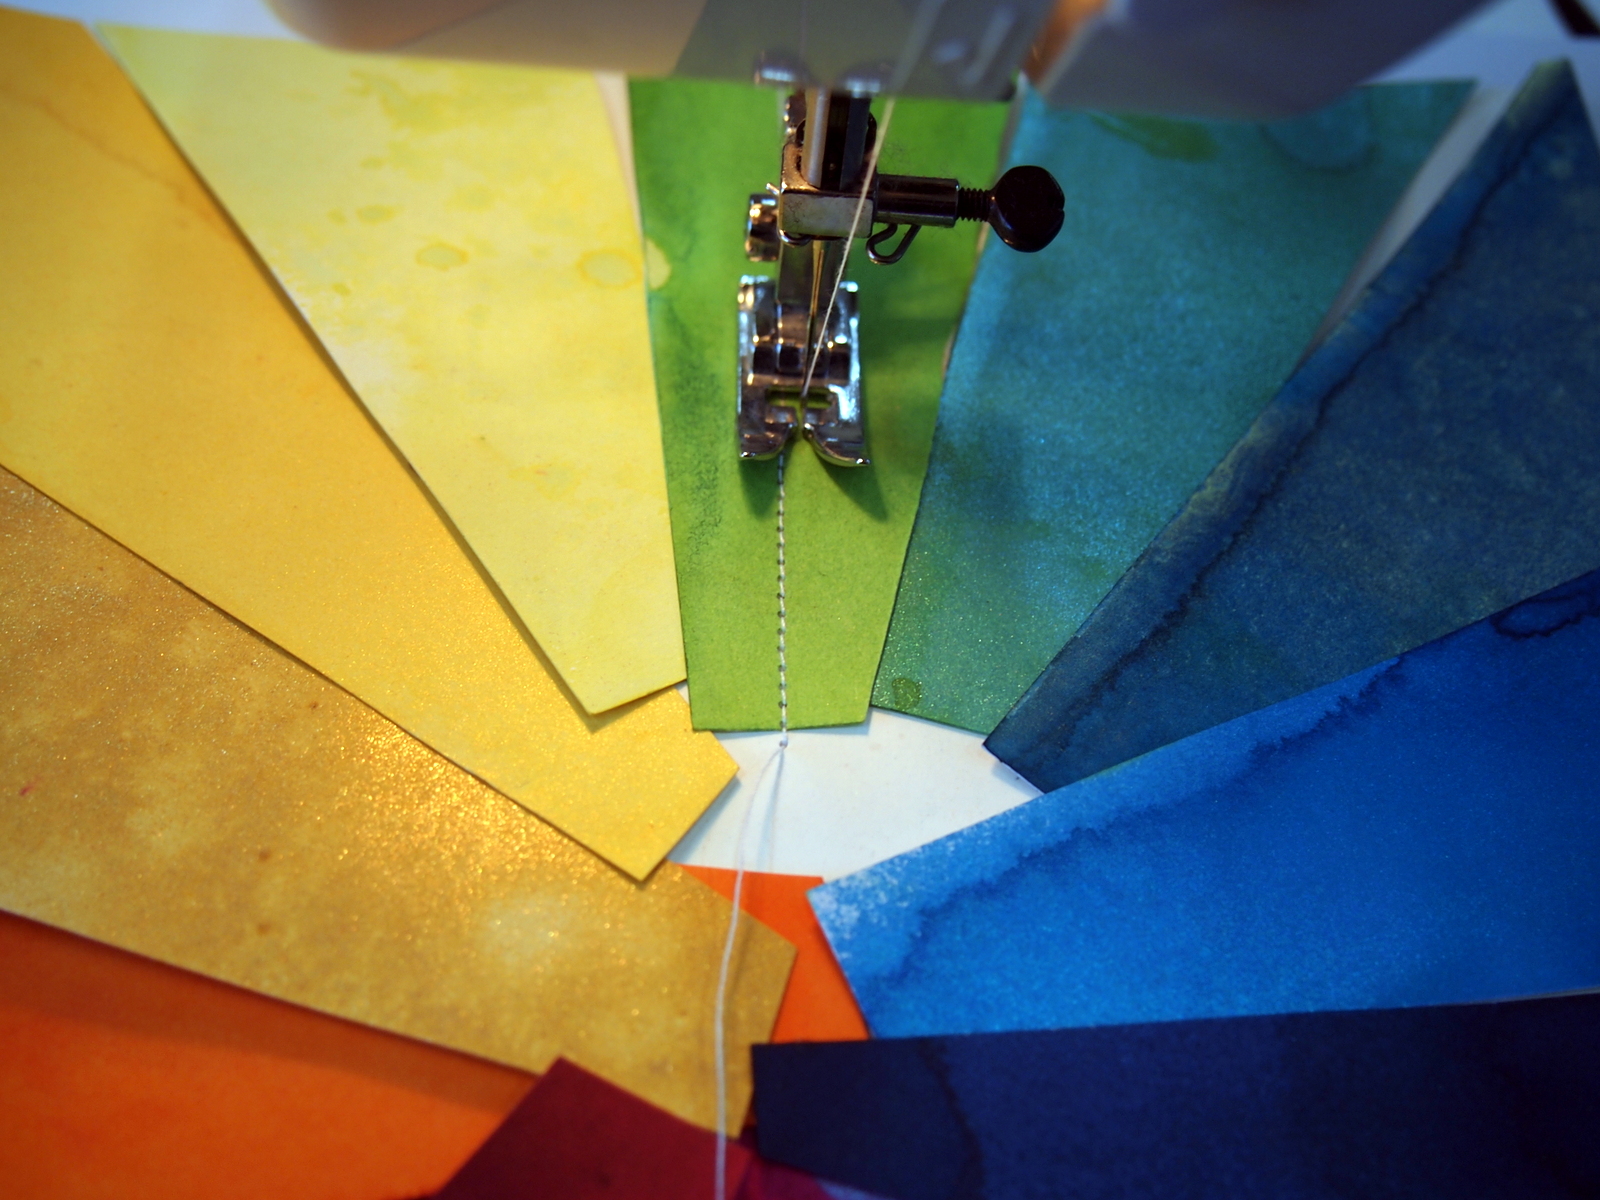
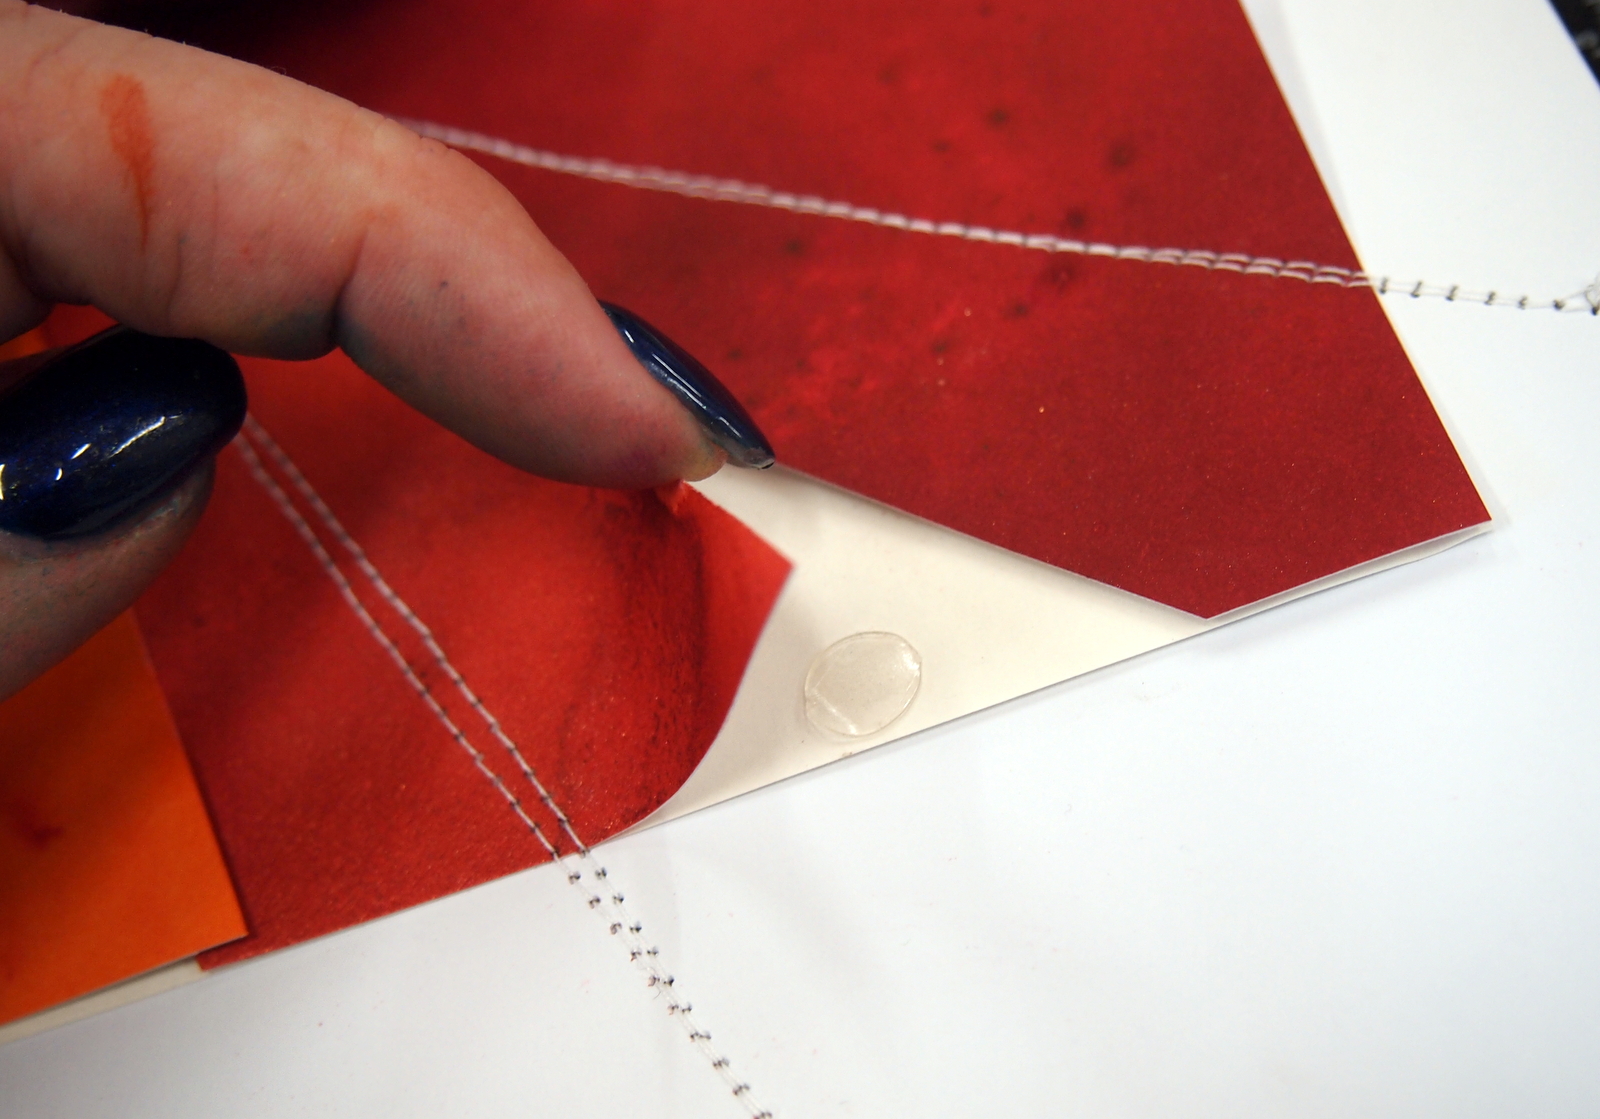
I trimmed them all down a bit into a triangle to help with the overlapping, then used a few removable dots to keep them in place.  I trimmed the whole sheet back to neaten the edges before using a sewing machine to  secure to the white cardstock background.
OLYMPUS DIGITAL CAMERAOLYMPUS DIGITAL CAMERA


Once it was on the page, I went around and lifted the edges of each segment and removed the paper and removable dots from underneath so that you couldn't see it.
OLYMPUS DIGITAL CAMERAOLYMPUS DIGITAL CAMERA


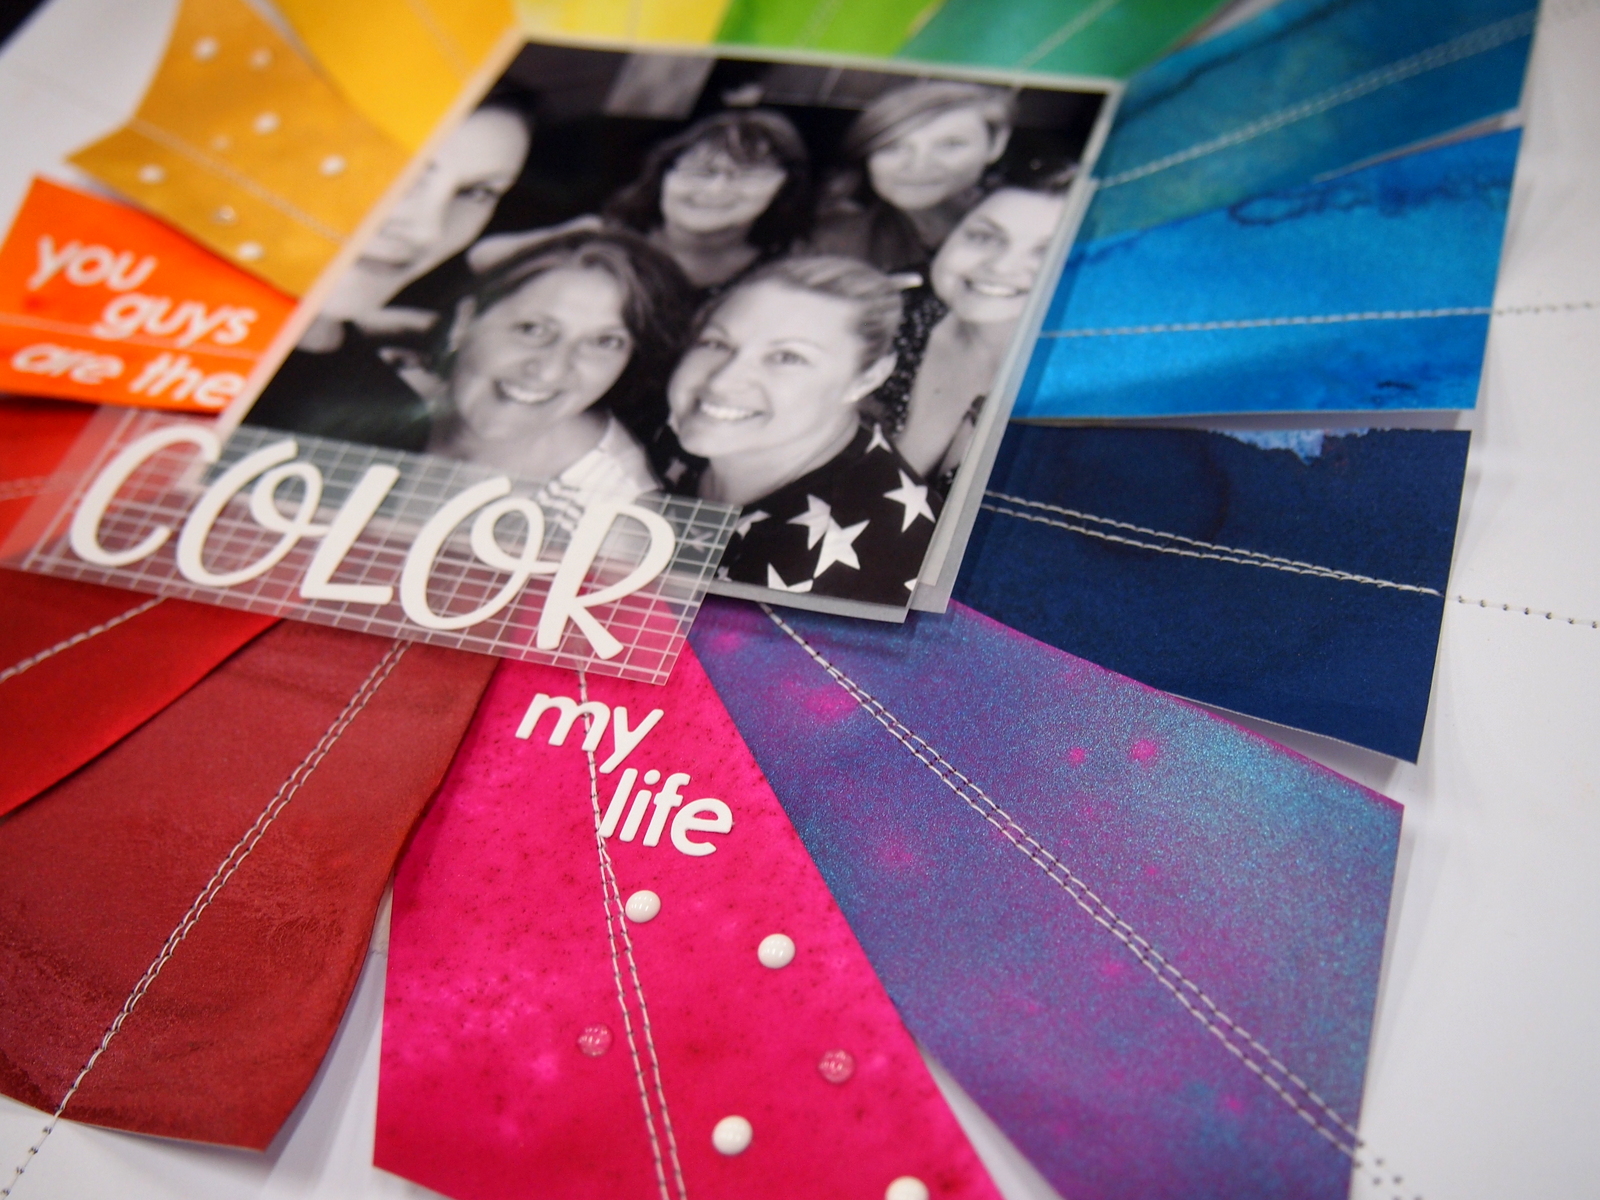
I used vellum to mat my photo before foam taping it to the page to hide the messy area in the middle before finishing with the title.
OLYMPUS DIGITAL CAMERA


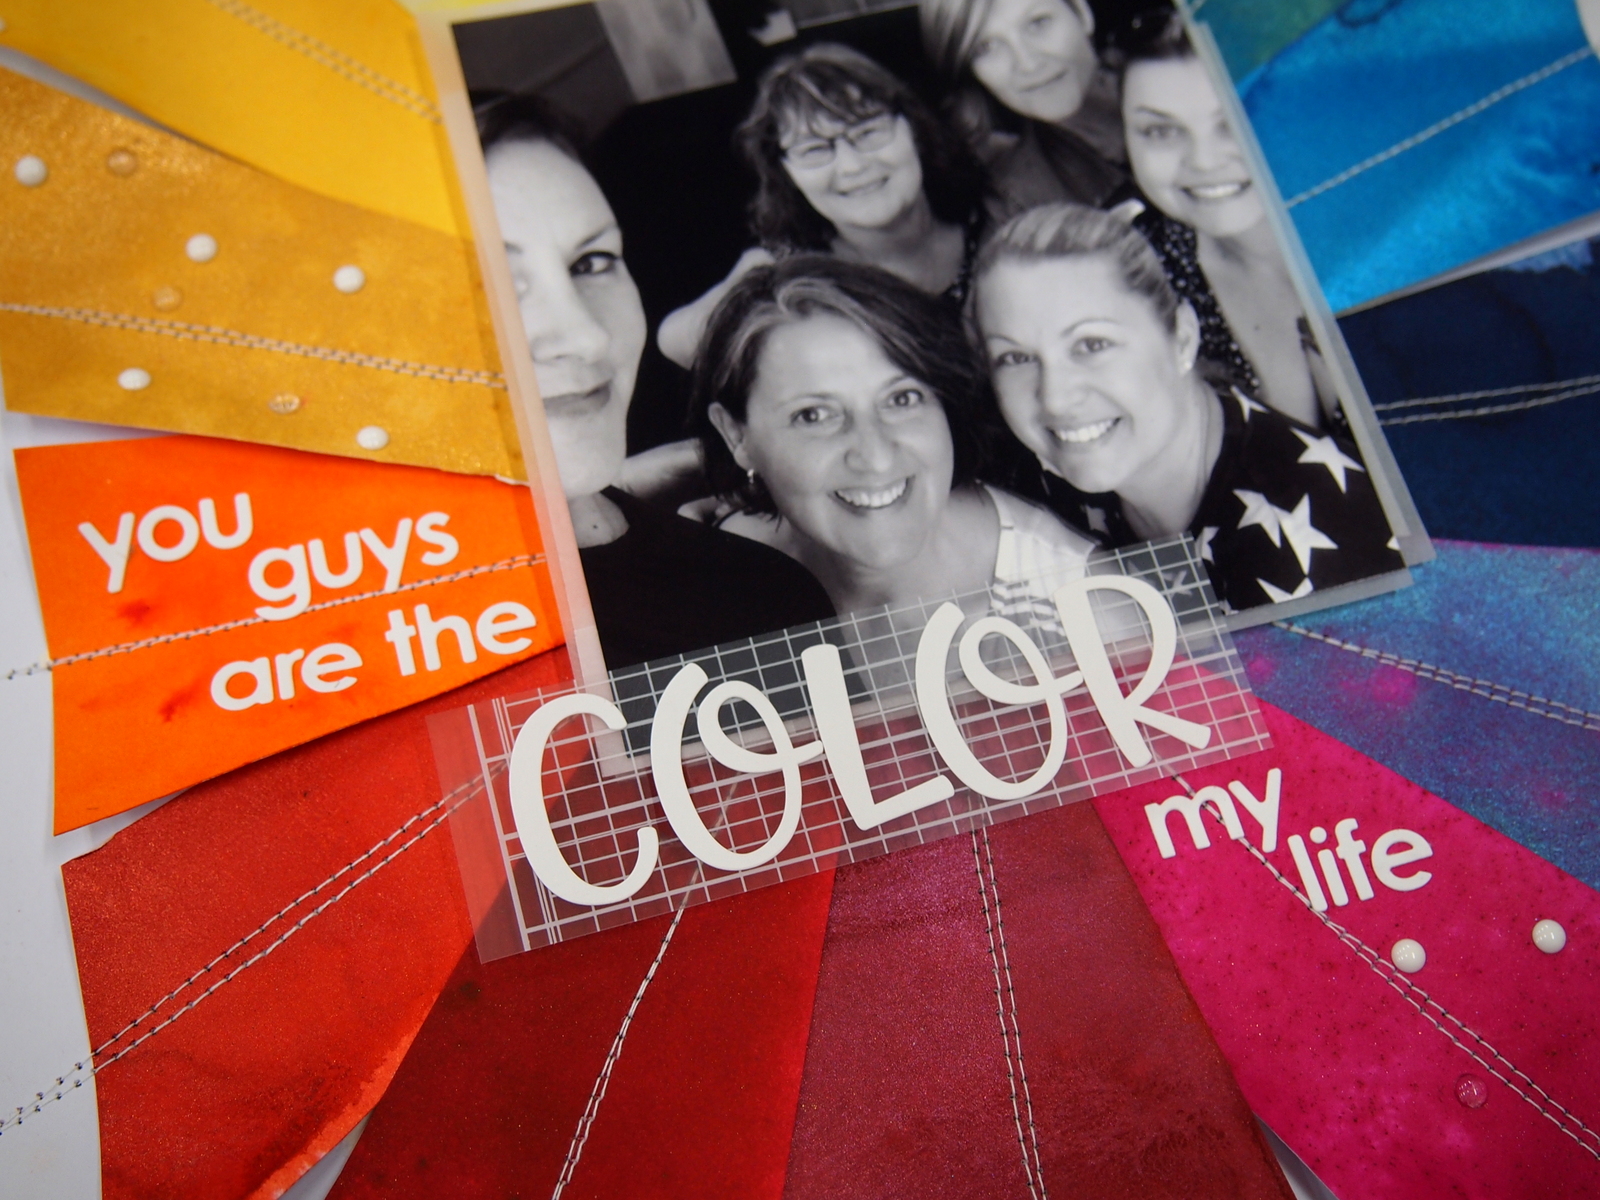
I love this page and it now hangs proud on the wall in my studio - that color just brings a smile to my face and the memory behind the photo makes me laugh out loud!
OLYMPUS DIGITAL CAMERA


And for all you Aussie Creatives, come and see me at the Wollongong Crafters Fair doing daily demonstrations with Shakers and the the Embossing Powders or if you are in Adelaide, I have a Magical Workshop planned for Saturday 4th April - email me for information - natmay@adam.com.au

Crafters Fair Wollongong - E CARD

Thanks for stopping by
Natalie

Tuesday, August 16, 2022

StencilGirl tutorial

 Hi there fabulous Creatives!

Today I am sharing some simple and bright Thank You Cards created using Alcohol Inks and the ATC Mixup Missigman stencil.


Having an online stores means we get to send out some fabulous crafty goodies to our customers and we are lovers of personalised gift wrapping and hand made thank you cards!

Although it can be time consuming, creating 3x4 inch Thank You cards is a total relax thing for me and I find it to be the perfect way to unwind!

Today I am sharing a few of the latest little cards I have made ... let me talk you through them!

I start with a few Alcohol Inks that are from the same colour family - warm colours seem to be a fave at the moment - and some glossy cardstock and yupo paper.

I always start on a A5 size piece then trim them down.  Moving the inks around on the card can create some simple and effective finishes when dry. I usually make a tonne of them so I have a stash ready to go too!


Once they are dry, I used the ATC Mixup Missigman stencil and some Liquitex Gesso with a blending tool to lightly create the images I was after. The size of the designs on this stencil were perfect for the cards.


When the gesso was dry, I used a couple of different permanent pens to give the images a scribbly outline finish and add some detail. On a few of them where the gesso was not solid enough, I used a brush tip white paint marker to give it more depth.


I love that each one is different and with a scribbly border, they are all personalised!


Each little card will also get a custom stamp on the back - just right words to say thanks!


Thanks for stopping by and look forward to sharing with you again soon!

Natalie May!
Instagram - @happydaks
Website - www.nataliemay.com.au


Sunday, May 1, 2022

Lindys Love


Hey there Lindys fans

Its been a while but I’m back with a quick and easy project for you today using Magicals!

Earlier this year here in Australia, I released my own range of Collage Papers and I have been having so much fun with them!

These are ridiculously easy to use and I wanted to showcase this Vibrant Beauty on a tag ready to add to my Art Journal.

I started with a large Dina Wakley White Tag and gave it a generous coat of white gesso to seal the paper.  Using Gel Medium, I applied the Collage Paper image and then used a clear gesso over the whole tag to seal it.

Next I used some Hero Paste (texture paste) with a Natalie May Scrapbooking Stencil to add some texture around the image and then allowed it to dry.


I wanted to enhance the colours in the Collage Paper so I swatched a few Magicals first to see what was going to work best.

I made up washes of colour in a little palette then used them to colour the chipboard, die cut and the Heidi Swapp Hearts from my stash (yes – I have been hoarding these for 10 years! No Judgement)


While they were drying, I blobbed and puddled (yes – the technical terms) the colour onto the tag and then added a few splatters!


Once dry, I edged the tag with the nozzle of the Dragonfly Demin Starburst Spray to give it a little depth.

I am loving the bright and vibrant color and it’s super easy to do – Does not need to be complex or complicated!


LINDY’S PRODUCTS USED …

Thanks for stopping by!

Natalie May

Tuesday, April 26, 2022

A moody page for StencilGirl

 Hey Stencil Fans!


Natalie here today with a little Art Journal page for you!

This one is all about layers - but layers of Moody black and layers of words.


Last month here in Australia, I released my very own range of Collage Papers so I thought I'd build on one and create a deep and dark page.

I started with a gessoed page and then used gel medium to adhere the collage paper to the page.


I then used a random script stamp to add some words with black archival ink followed by a stabilo stubby black pencil to add a wash across the top of the page.


Next I used the Words to Live Stencil by Carolyn Dube and a Black Spray ink to add a layer of words over the black wash. I masked off the face detail with paper towel so I didn't get any over spray.


Once dry, I used a black shimmer paint over the Sacred Words and Marks stencil by Jessica Sporn to create a new layer of words. Using the shimmer paint made the letter and words stand out and give it a bit of a shine.


For the focal point word on the page, I used a pale grey paint through the Seth Apter Unfinished stencil and then used a grey brush tip paint pen to add detail.


I finished by adding a few marks from the Floral Frolics Stencil by Wendy Brightbill around the page to tie in some of the colour I used in the title.


I am loving the moody feel to this page and love the layered letters and words!


Something a little different for your day.

Thanks for stopping by!

Natalie May


PRODUCTS USED